photo 81949b89-01e9-4b68-9ed7-2f5f0107c4a1_zps643f50f2.png photo 27be1839-4b5a-4876-9e37-0b226c2dd11b_zpsa7cee300.png photo ea055864-8a7a-4a03-8d8e-c2bc3183d188_zpscfef9c29.png photo ff1b7c14-acad-443e-b9bf-100ee7284711_zpsbe9025d0.png
Showing posts with label beauty. Show all posts

Sunday, August 24, 2014

Summer Nails!

I have recently been obsessed with nail art, and I will be posting more designs for inspiration in the future, but I wanted to first start with two of my favorite floral summer nail designs. 

Tropical Floral Nails

  1. Base coat and 2 layers of white polish
  2. Large neon purple flowers on each nail (or whatever color you want)
  3. Small yellow flowers on each nail
  4. Neon pink centers on the purple flowers
  5. Orange centers on the yellow flowers
  6. Yellow lines/dots/whatever you want on top of the neon pink using a toothpick
  7. Mint green leaves 
  8. Dark green leaves on top of the mint using a toothpick
  9. Wait for the design to dry, then two layers of top coat
Inspired by: http://www.chalkboardnails.com/2012/05/china-glaze-summer-neons-nail-art.html


Daisy Nails

  1. Base coat and 2-3 layers of mint green polish (light blue looks nice as well)
  2. Using a striper, or I just wiped off the brush of a white polish and trimmed the brush to my desired width, paint 3-4 daisies on each nail
  3. Dot the centers of the flowers with yellow polish
  4. Wait for the design to completely dry and add a layer of top coat


Do you love floral nail art as much as I do?


Saturday, March 29, 2014

Drugstore Makeup Haul

Target is one of my favorite places in the world. I can shamelessly wander around the brightly lit makeup aisles for an hour and feel like all is right in the world. Today, I was on a mission to buy some new drugstore makeup, so of course Target was my immediate destination.


Here's what I got:

This is a repurchase for me. I absolutely adore the formula and the brush because they consistently give me separated, clump-free, long lashes. Also, I've found that even the regular formula does not smudge to underneath my eyes like some other mascaras do. 

This is also not my first time purchasing this product, but I had to get a new one because my last one was leaking all over my makeup drawer. Creamy, long-lasting, and crease-proof, this formula is fantastic for covering darkness under the eyes. I also like to use it around my nose, chin, forehead, etc. for days I don't feel like wearing foundation because it blends into my skin seamlessly. 
I don't have many waterproof mascaras because I think they are a hassle to get off and unnecessary for everyday wear, but I wanted to pick one up to use on special occasions or times when I want my mascara to be really long-lasting. I haven't heard anything about this, but I'm looking forward to giving it a try.

I already have a few of the Just Bitten Kissable Balm Stains so I really wanted to try the other formulas as well. Complex is a peachy nude that is matte, moisturizing on the lips, velvety, and really comfortable to wear. Clearly from my color selection I like nudes because of their versatility, but I do want to try some of the brighter shades. 

Demure is a cool-toned pink that has visible silver glitter, which wasn't evident from the packaging. So far, I prefer the formula of the Lacquer Balm to the Matte Balm because I like the moisturizing finish, but I'm not a huge fan of the glitter particles. I definitely will be buying more of these balms soon though.

I don't ever use lipliner, but I've been wanting to give it a try for quite a while. I wanted to get a mechanical lipliner instead of a pencil, and this was honestly only my choice because it came in a sealed package and hadn't been tested out yet (which is really annoying). Blush is a rosy mid-toned pink that feels slightly sticky and somewhat drying on the lips, even with lip balm underneath, but that might be because of the long-lasting formula. I will have to test it out more and see if I like it.


Have you been shopping recently? If so, what did you buy?


Tuesday, March 18, 2014

Loving Your Short Hair

Ever since I cut six inches off my hair in favor of a medium length hairstyle back in December, I have been itching to maintain that hair length. Although I do love all the things you can do with long hair (braids, buns, etc.), I don't like the split and stringy ends or the lack of volume. When I first cut my hair, I loved how I could immediately feel how thick and healthy my hair feltI didn't know that I had that much hair in the first place!

So, when I recently got my hair cut again, I wanted to return to that feeling. To be honest, when I first looked in the mirror and saw how short my hair was, I was absolutely in shock. I was almost in tears. I had asked for a shoulder length hairstyle, with images of Lily Collins and Alexa Chung's medium length messy, textured waves in my mind. However, I ended up with a long bob that took some time getting used to. This was not the stylist's fault, because what she gave me was a long bob with a shoulder-grazing length, but in my mind I had imagined this length when my hair was already curled, not when it was straight. By the time I got home and curled my new hair, it came to the middle of my neck.

How I Learned to Love Short Hair

What helped me get accustomed to my short hair the most was definitely all the compliments I received for my haircut. When you lack self-confidence, though it may seem petty, it helps to get different perspectives and opinions, especially when they are positive and confidence boosting. At school, surrounded by hundreds of girls with long hair, I actually felt proud to stand out from the crowd by taking this unintentional risk. Also, if you play a sport or want to tie your hair up in a ponytail, you still can! (Some bobby pins required.) Based on the super fast and easy styling, along with how it is more cohesive with my personal style, I think my short hair is here to stayat least for now.

My Hair-speration


My Hair Journey

Me with Long Hair (last year):


Me with Medium Hair (3 months ago):


Me with Short Hair (now):


What hair length do you like going for: long, medium, or short?


Monday, March 17, 2014

NOTW: Minimalist Manicure

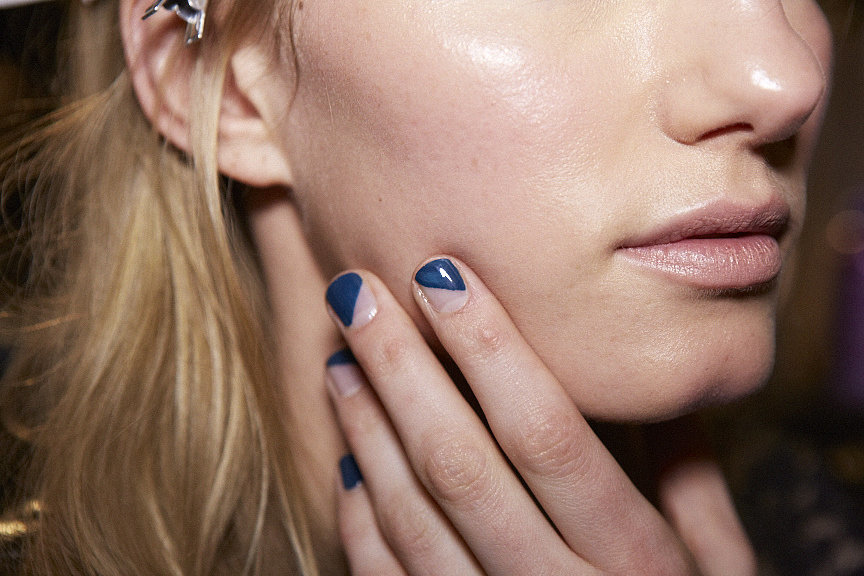
Inspired by New York Fashion Week 2014, along with a desire to do a fast and easy manicure given that it was already 10pm, I chose a minimalistic design for my nails this week. Also known as a floating manicure, this new form of nail design favors only painting part of the nail, letting the natural nail show through.

Paired best with muted fall colors, I think this trend is a modern and fresh way to relieve us from the overly sparkly and intricate nails from the winter season. All it takes to recreate is a steady hand and an eye for straight lines (if you don't have either of these, just tape your nails on a diagonal fill in the space).

Inspiration:

Photo credits to POPSUGAR Australia

My Recreation:


Don't forget to use a base coat and a top coat!

Nail Polish: Revlon Colorstay Longwear Nail Enamel in Blue Slate


What do you think of minimalist manicures?


Friday, February 21, 2014

Baking Soda Changed My Life Forever

For quite a while now, I have been struggling with something: greasy, heavy hair that never ever feels clean. The moment I would come out of the shower, I would already feel like I have product in my hair, especially at the crown of my head. Even when I would double wash my hair, the situation did not improve. I can't believe I didn't see it before--the problem was staring me right in the face--but a few days ago I finally came to the realization that I had product buildup in my hair. 

What is product buildup?

Essentially, it is what it sounds like. Every time you use hair spray, gel, mousse, wax, and even dry shampoo, you are slowly accumulating these products in your hair. The buildup causes your hair to look heavy, dull, dirty, and greasy, even if it is freshly washed. It can make styling your hair extremely difficult (something I can surely attest to) and it can also give you an itchy, flaky scalp.

How do I get rid of it?

Of course the moment my revelation hit, I turned to the internet for some solutions. Aside from a detoxing or clarifying shampoo, which was not an option for me because I wanted an immediate result, I found apple cider vinegar, baking soda, and even hand soap as a solution. The most appealing and well-received home remedy seemed to baking soda, so I gave it a try. 

Photo credits: femiology.com

What you need:

1/4-1/2 cup of baking soda
Water
  1. Rinse your hair with water and massage the baking soda into your scalp. 
  2. Divide your hair into sections, like you would do if you were using dry shampoo, so that you can place scoops of baking soda directly on your scalp, and do that all over your head. 
  3. Add a tiny amount of water and massage the baking soda into your scalp really well. Then leave it in for 5-6 minutes. 
  4. Once you have waited a fair amount of time, rinse your hair and shampoo and condition as usual (try to use natural, sulfate-free products). 
You will immediately feel how light and clean your hair is after this clarifying treatment. 

If you thought the baking soda hair fix was merely a rumor, think again. It actually does work, and it works extremely well! My hair is now light, bouncy, strong, and easy to style again. You don't need to spend your money on a fancy clarifying shampoo, just go to your pantry and you will find a quick, affordable, and effective solution. I plan on repeating this process every week or two because it truly did change my hair care forever.


Give it a try and let me know what you think!


Sunday, January 26, 2014

Nails Of The Week

After about two weeks of nasty chipped nail polish, I finally changed my nail polish yesterday. I was browsing the interwebs for cool designs and this one stuck in my head.

I am not a nail master, please excuse the edges :)

From left to right: Revlon Colorstay Gel-Smooth Base Coat, Circus By Andrea's Choice in Reverso,
Sephora by O.P.I in Dark Room, Revlon Colorstay Gel-Smooth Top Coat

Steps

1. Apply base coat.
2. Base color (2 layers), wait at least two minutes between each coat of polish for it to dry.
3. Use a dried out ballpoint pen or other dotting tool to make dots using your accent color. Start by dotting a line across the tip, then gradually make the dots smaller and smaller towards the middle of your nail.
3. Wait at least 30 minutes for the polish to dry, then apply top coat.

Tips

- Be patient! It took a lot of self-control for me to not apply my top coat a few minutes after I was finished dotting, but it was worth it in the end. You want to wait for each layer to dry to prevent smudging.
- You don't need an actual dotting tool. I just used a dried out ballpoint pen, but you can also use toothpicks, the back of a pin, etc.
- Use colors that contrast to make the design stand out (such as black and white).


Thursday, January 23, 2014

Touching Up Your Makeup

I will begin by saying that apart from blotting, I don't actually touch up my makeup at school. Yes, I do check to see if I have mascara smudging under my eyes, but I don't go out of my way to reapply anything. The reason is that I don't have that much time at school between classes, and makeup isn't really my number one priority when I am at school. However, if I do want to touch up my makeup before I go out somewhere, this is what I do.

TIPS

  • In the bathroom, use a toilet seat cover to blot (also, if you find it embarrassing to blot in public, just use the toilet seat cover while in the stall, no one will see). The material is as absorbent as blotting sheets so it works perfectly!
  • Other than concealer, steer clear from adding more liquid makeup to your face, it can get cakey very quickly. Instead, blend in your existing foundation to bring life back to it.
  • Make sure that you gently wipe away any mascara or eyeliner smudged under your eyes.
  • Use a light hand with powder, only in the areas where you need it (T-zone for me).
  • If your blush has faded throughout the day, add some more to bring back that healthy flush to your face. If you don't have blush on hand, just use your lipstick as a cream blush.
  • Reapply your lip color on clean lips so that it doesn't look blotchy and uneven. Use your finger to blend it in for a more natural look.
  • If your don't want to add more lipstick, put on some lip balm and blend it in for a smooth and polished finish.


Sunday, January 19, 2014

Buying Makeup 101

I'm not really a "buy on the fly" type of girl. Before I purchase any makeup, skincare, or beauty item, I always do a lot of research. Many makeup items can be quite pricey, especially higher-end makeup brands such as Chanel or even NARS. In comparison to drugstore makeup (which is even becoming more expensive than usual), one single makeup item can set you back north of $50. It is often difficult for me to justify making purchases because I tell myself, "You only have one face, how much makeup do you really need?" So I want to make sure that I truly love what I buy and that each product is an investment. 

image from sephoradiaries.blogspot.com
Buying makeup can sometimes be overwhelming, so I usually only buy makeup when I need something, or when I find that one area of my makeup collection is lacking or not up to par. My last makeup purchase was the Make Up For Ever Full Cover Concealer in 5. Here is my process of buying this item:

1. Address The Reason

The reason I wanted this item was because my previous concealer, the MAC Studio Finish Concealer in NW25 was not working well for me. The color of this concealer was far too dark and far too orange for me to use on my face (thanks MAC lady for "color matching" me, you did a really great job). I decided that the next concealer I would buy had to match my skin color perfectly, while at the same time be full coverage to cover up any blemishes or acne scars. 

2. Research

I had already heard a lot about this concealer before, so to do research, I looked for popular reviews on YouTube and online. The concealer is $32, so was not about to just hop down to Sephora and pick one up on a whim. This concealer would last me a really long time because I would only have to use a tiny amount each day, which is a plus. I find that hearing what other people say and feel about the product is extremely helpful, but I still don't stop there. Just because someone else likes something, doesn't mean at all that I will enjoy it as well.

3. SAMPLES

I cannot stress enough how much I believe in sampling makeup products before I buy them. Samples are there for a reason! I have quite sensitive skin, so I want to make sure that if I spend $32 on a concealer, that that concealer will be perfect for me. Also, in the store, lighting can be pretty wacky (MAC lady, I'm talking to you), so it is extremely important to see what the product looks like in natural light. If you use a sample for a week or two, and you still love it, then go ahead and buy it! I get my samples from either Nordstrom or Sephora. In this particular case, I got it from Sephora. 

Don't feel pressured to buy the product immediately when you get into the store. After I asked one lady to color match me for this concealer, she grabbed the product and gave it to me to buy. Just put it back! I feel like so many people don't know that you can ask for a sample, especially in Sephora. You can get samples for liquid items and for loose powders as well (which is how I found out how much I love the Tarte Smooth Operator powder). The employees are often kind and understanding, so don't be afraid to ask them for a sample, they are usually quite generous. In Nordstrom, the samples are more obvious because the makeup brands are slightly more expensive there, and the makeup ladies are also really nice about it (I got samples for my Chanel foundation there before I made the purchase). 

4. Buy It!

I buy my makeup at either Sephora or Ulta, but mainly Sephora because the marketing ploy of the Beauty Insider cards really works on me. I like seeing how many points I have, which is bad for me but good for Sephora because it turns shopping into a game that people want to win at. No shame. Anyways, when you decide that this product is right for you, go and get it. I bought the full size of my concealer when I was almost out of my sample, because you really want to get the most out of it. By following these steps, I find that I rarely ever regret any of my makeup purchases.


Have fun shopping, and remember, SAMPLES, SAMPLES, SAMPLES!


Thursday, January 16, 2014

REVIEW: Maybelline Instant Age Rewind Concealer

I caved. I know that I am late to the party and there are already several reviews on this product (which has been out for a very long time already), but only during a trip to Target last month did I finally add the Maybelline Instant Age Rewind Eraser Dark Circles Concealer to my makeup repertoire. 

oops that's the french side...my bad
(the bottom says Eraser Dark Circles Treatment Concealer with Goji Berry + Haloxyl)


(awkward photos of me looking off into the distance)            top: WITHOUT concealer   bottom: WITH concealer
This photo is with one generous layer of concealer on clean skin, and you can clearly see that it covers the redness around my nose and the dark purple under my eyes. My dark circles are obviously not that severe, but this concealer does do a really good job at covering them up. If you do have issues with severely dark circles, you will probably want to find a concealer that is more full coverage. 

When I first bought this concealer, I immediately ripped off the packaging and applied it in the car. Honestly, I was blown away by how lightweight, smooth, and easy to blend the concealer was. It also made my skin feel really soft! It has light to medium coverage and looks great with or without foundation underneath.

Color

Another thing I love about this concealer is that the color is an exact match for my skin color. It is a tiny bit more pink than my skin color, but it works well to contrast the darkness under my eyes. Because the color is exactly my skin color, it is not as brightening as it could be, but there is a Brightener (and a Neutralizer) shade in the range. The color range is quite limited (Fair, Light, Medium, Honey) so that is a deficiency of the product range as a whole.

Applicator

It has a sponge applicator--which can be unsanitary--that dispenses the product by twisting the red collar in the direction of the arrows, but it works great when you are in a rush. I wouldn't recommend trying to blend the concealer in using the applicator, but rather use it to place the product to conceal any darkness under your eyes or redness.  

Formula

However, I think the formula is a bit too dry for my liking, especially since if I have any dry patches in that area, the product will cling to them and be really noticeable up close. On the other hand, throughout the day, the concealer doesn't crease and it stays put well when there is a layer of powder on top. I have oily skin so I need the powder, but if you have drier skin then you can skip that step. 


I use this Real Techniques Deluxe Crease Brush to blend in the concealer since it is the perfect size and it is extremely soft. You really want to blend the product in immediately or else it will set and be difficult to work with. This also relates to how it is moisturizing, but not as moisturizing as some other concealers are.

OVERVIEW
If you are on a budget, or are looking for a great drugstore under eye concealer option, you should really check this out. Despite its few shortcomings, this product can still hold its own alongside pricier high end concealers.


Tuesday, January 14, 2014

2013 Must-Haves: Hair and Nails

Here is the third part of my "2013 Must-Haves" series, this time on the hair and nail products that were my favorites of 2013. Hopefully, this series will help you get a feel for what types of products I use and enjoy!

Hair

I'm not as big on hair and nails as I am on makeup, but I still know what works for me and what doesn't, and I'm also constantly searching for the perfect products for that work with my hair. Though it definitely is not glamorous, my hair is temperamental and I sometimes suffer from a dry, itchy scalp along with oily roots. In an ideal world, I would only have to wash my hair a few times a week, but the longest I can go while still maintaining some level of style is washing my hair every other day. And even then, I have to dutifully rely on dry shampoo to cut back on the dirtiness and griminess of my hair. However, these products are what I turned to to take care of both my scalp and my ends.


Styling Product: Sunsilk Layers Texturizing Wax (discontinued)...alternative: Aveda Light Elements Defining Whip


Nails

My favorite nail polishes come and go with the seasons and with my moods, which I think most of you can relate to. Though, there are those colors that I want to wear constantly and these are those polishes of 2013 that I got the most use out of. I don't always stick to the typical polish colors for the seasons, but my favorites clearly represent each category: gold for winter, pastel for spring, neon for summer, and oxblood for fall. In general, I like to change my nail polish every week or two, depending on how much time I have with school and all, but my polish is able to look fresh and acceptable for at least one week because I use four layers. I start with one layer of base coat, two layers of color, and end with one layer of top coat. This sandwich of nail polish really keeps my nails from chipping for quite a long time.


Winter Polish: Essie Pennie Talk
Spring Polish: Butter London Muggins
Fall Polish: Revlon Vixen


What hair and nail products were your 2013 winners?


Monday, January 13, 2014

Four Steps to Morning Skincare

Mornings are often the hardest times for all of us sleep deprived individuals, but with a solid beauty regimen, I am able to slightly alleviate the burden of waking up. In the mornings, I don't want to have to think very much about what I am going to do, wear, or put on my face--which is why I always lay out my outfits for school the night before. Instead, over time, I have developed this habitual process that makes what comes immediately after waking up more of an innate reaction than a thought out response. Also, if this process seems tedious to you, know that all these steps honestly have a purpose. By being kind to your skin, your skin will be kind to you. 

(for a full list of my skincare products and links see my "Must-Haves: Skincare")


1. Cleanse


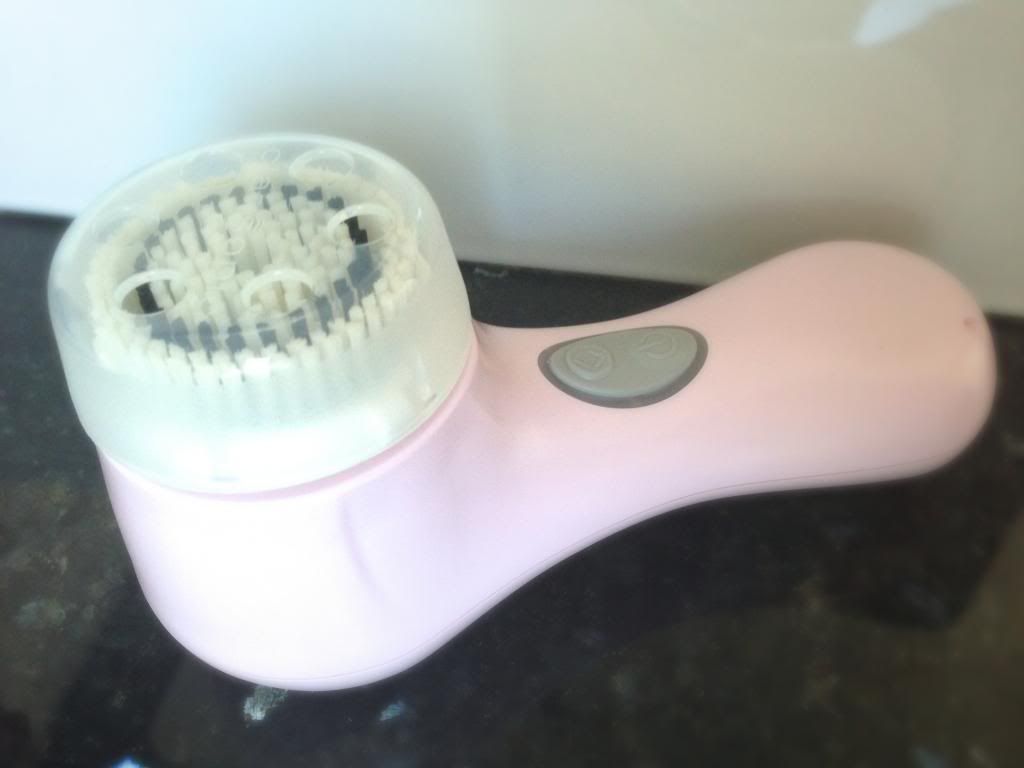
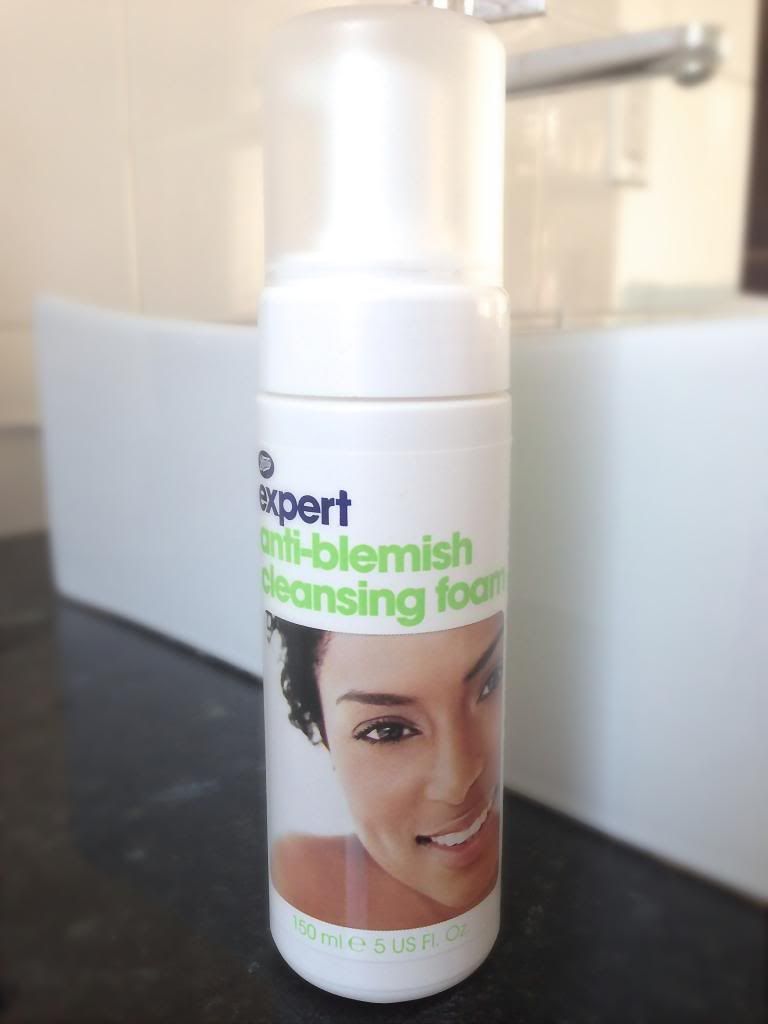
My day truly begins after I have washed my face with cold water, using my trusted Clarisonic Mia 2 ($142.50) and Boots Expert Anti-Blemish Cleansing Foam ($5.49). I first got the Clarisonic as a birthday present two years ago, and I must say that it has changed my life. That may sound dramatic to some of you, but it may be the Clarisonic by itself, or the combination of it with the rest of my routine that has made my skin more clear and evenly toned than before. Even though it is expensive, it truly is an investment, especially given the two year warranty and great customer service: I don't know what I would do without it! Back to my routine, I find that using a foaming cleanser with the Clarisonic is ideal for my sensitive skin, and I go through bottles and bottles of this cleanser from twice daily use--I actually have four in my bathroom right now--so the price doesn't hurt.


2. Treat


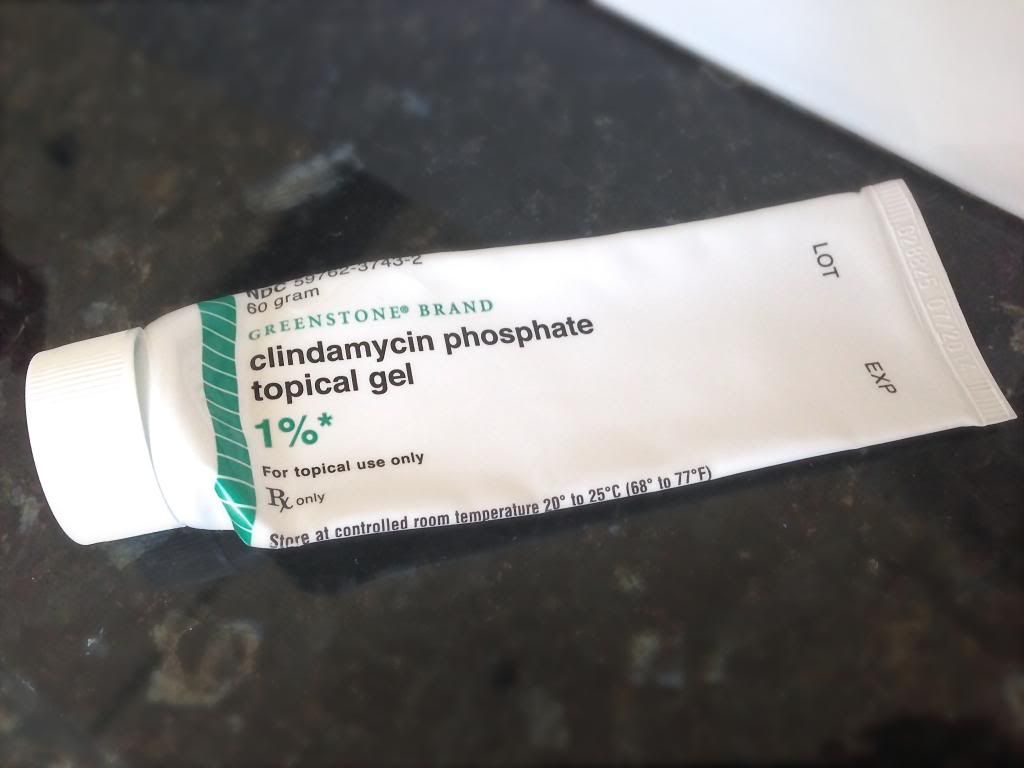
After I wash my face, I apply treatment to any spots or breakouts I may have. I use this prescription from my doctor: Clindamycin Phosphate Topical Gel 1%. I've used this since middle school because Salicylic Acid and Benzoyl Peroxide really weren't working well for my breakouts, and this was the only acne product that helped clear up my skin. If you have had a similar experience as me, be sure to talk to your doctor to see what they recommend. I use the treatment under my moisturizer so that it has the most contact with my skin, delivering the most direct effect. 


3. Moisturize


After the spot treatment has dried, I use my Philosophy Take A Deep Breath Gel Moisturizer ($35.00) all over my face and neck. If I were to only give one beauty tip, it would undoubtedly be: Moisturize! Moisturize! Moisturize! It doesn't matter what skin type you have, you can find the perfect moisturizer for your skin (which really is the difficult part). This moisturizer is good for my skin because it is an oil-free gel, so it is lightweight, doesn't clog my pores, and soaks in quickly. Don't be stingy, slather it on, gently of course. Moisturizing now will pay off in the future. 


4. Protect


Easy to forget, but important to remember, sunscreen cannot be forgotten...ever. It doesn't matter whether it is winter, summer, spring, or fall, you always have to protect your skin from the sun's rays. My sunscreen of choice actually came to me as a sample from Ulta, and I'm glad that it did. It's the CōTZ Face Natural Skin Tone SPF 40 ($19.99). This sunscreen has a matte finish, so it isn't greasy and it won't make your skin look oily, which is an important feature for me. It is tinted to a generic skin color, so it does give you the tiniest hint of coverage, but it isn't too noticeable and doesn't affect the product's appeal. 

What is your morning skincare routine? Do you have any skincare products that you swear by?


Sunday, January 12, 2014

All About My Eyebrows

I will begin by stating how I absolutely loathe red-hued eyebrows. However, if reddish eyebrows flatter you, by all means, go for it, but they do not suit me at all. In my opinion, cool-toned, bordering on grey colors look far more natural than their warm-toned counterparts. My hunt for the perfect cool-toned product seems endless, but for now, I have found a few products that work well for me. 


NYX Brow Cake Powder in Taupe/Ash--$5.99


Anastasia Brow Wiz in Medium Ash--$21.00

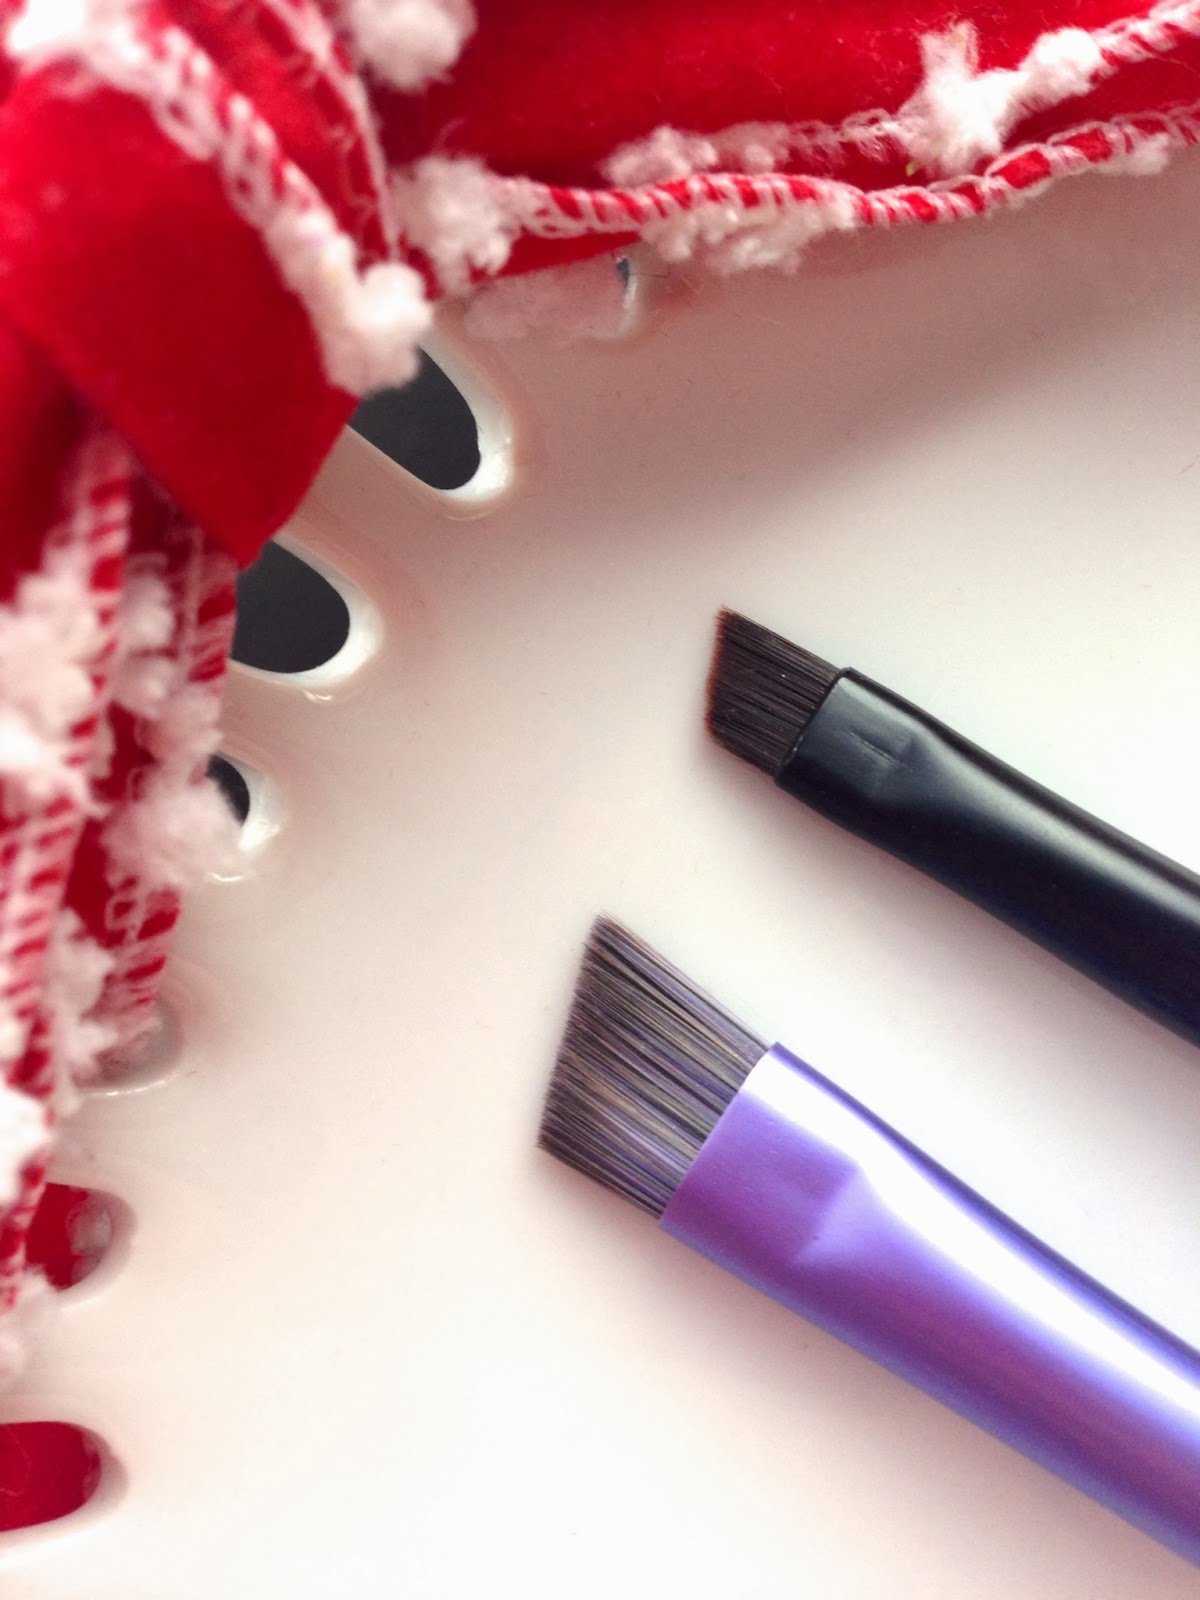
Top: myglam Eyeliner Brush  Bottom: Real Techniques Brow Brush 

Brow Powder

NYX Brow Cake Powder in Taupe/Ash--$5.99

Personally, if I only put on one thing, I always always always fill in my eyebrows. Despite my British mother, I have inherited my dad's sparse Asian eyebrows that do not show up in any photographs unless they are filled in. I cannot emphasize enough the need for a well-defined brow because it instantly completes any face--with other makeup on or without. My current eyebrow product that I must have with me is the NYX Eyebrow Powder in Taupe/Ash. Aside from it's extremely reasonable $5.99 price, the brow powders are the ideal colors for me because they are cool-toned and ashy, meaning they don't have any red in them. On a side note, please excuse how extremely gross the brow wax is in the product--the powder mixes in and it gets messy, which is exactly why I don't use the wax anymore.


Brow Pencil

Brow powder and brow pencil are completely different products that achieve a similar, but noticeably different, effect. Powder tends to stay on the slightly more natural side, while pencil can often look drawn in. The NYX powder is obviously far more affordable than the brow wiz and lasts twenty times longer than the few month life of the brow wiz (from daily use). However, the brow wiz is a cult favorite for a reason: it's faster to use, more travel friendly, and the formula is not too soft and not too hard so it stays on all day.


Brow Gel

Chella Defining Eyebrow Gel--$18.00

I don't really use brow gel that often, but if I feel that my brows are just too uncontrollably long and need to be tamed, this is the one I use. I am also not too fussy about brow gel, but this is the one I have. I am sure that Maybelline Great Lash in Clear would work just as well.


Brushes

myglam Eyeliner Brush

This brush is what I use if I want a really sharp and defined line. Because of how dense the bristles are, it manages to get a fine line, but it doesn't pick up and hold as much product. Therefore, I often have to go back into the powder several times in order to achieve the effect that I want.

Real Techniques Brow Brush (from Starter Kit)--$17.99

I am a huge fan of all the Real Techniques brushes, this one including. Larger than most angled brushes, this brow brush really allows me to fill in my brows quickly and precisely (which is exactly what I need when I am rushing to fill in my brows while in the car, on the way to school). The bristles are more loosely packed so it picks up and holds powder well which means I can use less product and achieve the perfect effect. This really is a must-have brush for me!

What are your favorite brow products?


2013 Must-Haves: Skincare

This is my second installment of "Must-Haves" and this time I am going to mention all the skincare products that I couldn't live without in 2013. For some background information on my skin, I have combination/oily, sensitive, and sometimes acne-prone skin that can be difficult to match products with. But through a lot of trial and error, here are the items I found that work well for my face.


Daily Moisturizer: Philosophy Take A Deep Breath 
Night Moisturizer: Cetaphil Moisturizing Cream
Makeup Remover: Bioderma Créaline TS H2O
Treatment: Clindamycin Phosphate Topical Gel 1%
Tool: Clarisonic Mia 2 in Pink

What are your skincare must-haves?


2013 Must-Haves: Makeup

This is going to be my first post of my new "2013 Must-Haves" series where I talk about all the products that came out on top for me in the past year.

I often find that I have so many unnecessary items even just in my modest beauty collection that I really don't use very much. However, there are those products that made it to my everyday-use-makeup-box that I gravitated towards and always needed on hand. By no means did I use all of these products everyday, but if I wanted a full face of makeup, this is what I used.


Face


Eyes 


Lips

Lipstick: Mac Viva Glam V

What are your makeup must-haves?